Tuesday 22 January 2008

An MP3 Solar Charger & Battery For £1:25p


I love my MP3 player, but a concern was its AAA battery demands, then I found that many solar garden lights used AAA bateries. So I bought a pack of 4 solar lights for under just under £5, took two of them apart and removed (snipped off) the LCD bulbs and put them back together again. I then left the bulbless units in the sun and when the batteries had charged replaced them with batteries from the other two lights. The other two complete solar lights, as with the two removed LCD bulbs, will be used for later projects. The solar chargers will, of course, charge up any rechargeable AAA batery.

Friday 18 January 2008

Build An Insect Hotel


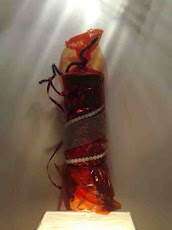
You will need a plastic bottle, one of the large types that are used for bottled water seems best, (the one in the photos is 4” / 10mm diameter) and several lengths of bamboo. If you or a friend have grown your own bamboo and have a few lengths that have been lying around for a period, then these are perfect; you can of course use other bamboo. You will also need some galvanised garden wire.

Tools required:

You will need a ‘Stanley’ type of knife, a saw, a pair of pliers that have a cutting section for the galvanised wire and a tape measure.

1. Cut the bottle to a convenient length, in the case illustrated it was at a ridge on the bottle that was about 6 ½” / 17mm from the end. 2. Make two small holes in the bottle that are in line with each other and around 2” 5mm from each end. 3. Cut two lengths of the wire about 18” / 46mm long and run the two ends of each piece through different holes, each on the inside the bottle circling them against the inner wall. 4. Cut your bamboo into lengths, in this case I cut them 7” / 18mm long, and push them into your container until it is full. 5. Twist the wire (but not too tightly, it can break) at the point where it emerges so as to lock the bamboo into place and again at the end in order to form loops. These are your fixings, and can be extended by other lengths of wire if needed. Test the construction by holding the open end down and shaking gently. If any canes fall out, put another one in.

The Hotel will need to be positioned preferably where it will not swing around and protected from the sun. The closed end pointing towards the prevailing wind in winter and pointing slightly down towards the open end so as to drain should any water enter.

Solitary bees often live in old mice nests; I have been reliably informed that they like the smell, so old canes that have been left on the ground and so have perhaps been the attention of our little furry friends will be ideal for them. Lacewings are fond of the colour red, if you can locate a red bottle they may prefer this.

A Butterfly Feeding Station


As the disaster that is Climate Chaos increases we are losing many of our native bees and insects that are needed to pollinate and predate on the more unwelcome species that are now arriving at these shores. Butterflies are also among those that are threatened by the changing climate but it is easy to feed them with a Butterfly Feeding Station, and, like the Insect Hotel, it should cost little or nothing to make.

For the Feeding Station:

You will need two small empty yoghurt pots, a wire coat hanger and a sponge. The one I used is the spare from an old paint roller, but it would be just as effective to cut a sponge into the required size.

Tools Required

A pair of pliers & scissors

1. Cut the ends off the yoghurt pots as per the photo. At the ends of the long part of the coat hanger, cut off one end at the top just before the V bend and at the other end just after the V bend using the cutters at the side of the pliers, as can be seen in the photo. Bend the lower section that has been cut off after the V section flat as this will be the lower part. Make a small hole in the centre of each of the cut off yoghurt pots. This needs to be tight fitting, and for mine I put the flat side down on a hard surface, (glass chopping board) held the point of a knife in the centre and twisted the pot end while holding the knife still. Put it all together as per the photo and bend and cut the end for a hanger.
Apply a mixture of five parts water to one part sugar to the sponge and hang the result of your work up in the garden.

Do You Like Yoghurt?

The supermarket choice is vast and expensive, so why not make your own? It could not be simpler to do so. You need a bowl that will hold two pints of milk, a plate to go over it and some towels / blankets to cover it all. Heat the milk to near boiling, and allow it to cool to blood temperature, you do this by sticking your (clean) finger in it, when it feels neither hot or cold you are there. As this happens scald the bowl with boiling water, this 1. kills any bacteria that might sour the yoghurt and 2. heats up the bowl. Cover the bowl with the plate to bring this to the same temperature and then pour the water away, allow the bowl to steam off, don't wipe it, a few drop of water will not matter. Place the bowl on a few folds of towl to insulate it, pour in the milk and then add a small pot of plain organic youghurt that you have allowed to reach room temperature. Stir it all together and then cover it well with your towels / blankets / whatever to insulate it, leave it for 12 hours, uncover and stir it all together and there you have your yoghurt. Place it in the 'fridge, add brown sugar, fruit, jam, honey, whatever is your fancy, use it for cooking or for curry, but before you do fill your (cleaned) empty yoghurt container with your yoghurt as this will be the starter for the next batch you make.

DIY Solar Electricity


At present I am remaking my workshop and naturally want it to be 100% carbon neutral. While it is still in the process of sorting out I decided to start on the lighting as the nights were getting shorter, and I needed to see what I was doing, I fitted up the solar lighting shown here. It was, to say the least, very easy indeed. I used a 12 volt battery trickle charging solar panel from Maplins, this was on offer at £9.99 and a £30 inverter (a gismo that changes 12 volts DC to 230 volts AC) from Ebay. Initially I used one second hand 12 volt battery and connected the panel to the battery, the battery to the inverter and the inverter to two flourescent tubes. It was as simple as that. I now have six S/H batteries fitted up although the single battery ran the tubes for several hours. If you do this please don't forget that 1. A 12 volt car battery is not a toy and that if a spanner or suchlike shorts out the terminals it will soon turn red hot and 2. The power output from the inverter could be fatal if not treated with respect, so please, do as I have done and connect up an RCD, a Residual Current Device. This is an item that detects the power balance between the positive and neutral 230 volt circuit and switches the circuit off when it detects an imbalance. For future use I will no doubt need a larger panel as I intend to use the workshop to its full capacity, but I will keep the current drain for the equipment that I use down to a minimum, i.e. rechargeable drill etc. The present set up will run lap-tops, faxes, printers etc, but will not run a tube type colour monitor, although a LCD type is no problem. One photo shows the lights working and the other the items I have mentioned.

Chemical Free Cleaning

Have you thought of using vinegar? It is mentioned in the Bible.We all know that Jesus was offered water and vinegar on a sponge,a popular drink for the poor and for Roman soldiers when in camp,but did you know that in Ruth 2:14 it is a dip for bread, and in Proverbs 25:20 it is a cleaning formula.It was used as an antiseptic in WW1 and it is possible that the Good Samaritan used wine vinegar on the injured man's wounds as it would have been a useful part of a first-aid kit. So what can it be used for? The following are for white vinegar only:-

As a surface cleaner, use it straight with a few drops of lemon juice,or without the juice for wooden chopping boards. As an oven/microwave cleaner, put 3 tablespoons in a small bowl of water and bring to the boil for a minute (microwave) or three (oven) and wipe off the softened deposits. Use vinegar instead of liquid rinse aid in a dishwasher. Clear blocked sinks & basins by pouring some Bircarbonate of Soda down the plug hole and then add some vinegar and place your hand over the plug hole to keep the fizzy reaction down. For grimed on tea of coffee stains in cups or mugs, pour a couple of teaspoonfulls in the offending article, add some salt, and rub with a cloth. A few drops added to the rinse water will leave items squeaky clean and help to prevent water spotting on glass. For limescale in the shower/sink use vinegar and washing soda as in Prov 25:20. For windows add 1 part vinegar to 10 parts water spray on the windows with that spray bottle you have been saving, and rub like crazy with old newspapers, worked perfectly for my Mum!.

And so it goes on... Safe, biodegradable and cheap.